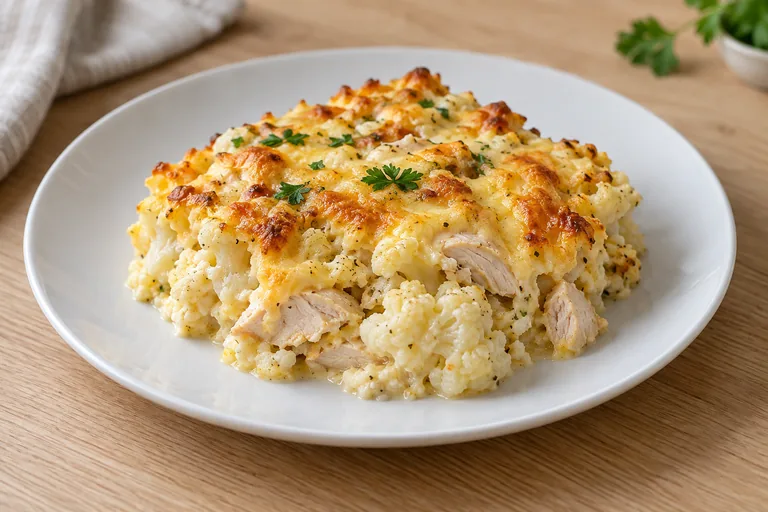
烤鸡花椰菜蛋奶酱
一道营养丰富的烤菜,鸡肉和花椰菜上覆盖着奶油奶酪蛋液,软烂可口。
- 烹饪时间
- 40 分钟
- 份量
- 489 kcal
- 材料
- ≈ $2.78
- 蛋白质
- 51 g
材料
- 1 Chicken breast fillet包装 800 克 约等于 $7.23 120 克
- 2 Cauliflower (frozen)包装 400 克 约等于 $1.80 200 克
- 3 Eggs包装 10 个 约等于 $1.93 1 个
- 4 Milk 2.5%包装 930 毫升 约等于 $0.88 80 毫升
- 5 Hard cheese包装 200 克 约等于 $2.70 35 克
- 6 Butter包装 180 克 约等于 $1.58 6 克
- 7 Salt 2 克
- 8 Ground black pepper 按口味
灰色行表示常备食材:盐、油、香料。它们不计入每份价格。
做法
预热烤箱至190°C(375°F)。将鸡胸肉切成2厘米的方块,奶酪切碎,用半块黄油涂抹烤盘。
将冻花椰菜在沸水中焯煮5分钟,沥干水分,让其蒸干。
在中火锅中融化剩余黄油,将鸡肉煎6分钟,不断翻动,至外表金黄且内部无粉色。
将鸡蛋、牛奶、盐和胡椒一同搅拌均匀。
将花椰菜和鸡肉铺入烤盘,倒上蛋液,撒上奶酪。
烤20分钟,直到表面金黄且蛋液变稠。
静置5分钟,切成份量,即可食用。
小贴士
- 为什么这样做
- Blanch the cauliflower first to soften it evenly and prevent a raw center; overcooked florets turn mushy and lose shape. The 5-minute blanch also removes bitterness from frozen cauliflower. Check the florets bend slightly when pressed. If they snap, they’re done.
- 可替换食材
- Use 100g Greek yogurt for milk to make the sauce thicker and tangier. Swap frozen cauliflower for fresh if thawed; drain well to avoid a soggy casserole. Skip the butter if needed. Use 1 tsp oil in the skillet for the chicken.
- 常见错误
- The casserole will taste undercooked if the center is jiggly or the egg mixture hasn’t set; use a thermometer to confirm 75°C. Overbaking dries out the top and makes the sauce grainy. Stop when the edges are golden but the middle is still slightly wobbly.
- 保存与加热
- Store for 3 days in the fridge; reheat covered in the microwave for 2 minutes, stirring halfway. Freeze for 1 month if wrapped tightly. Thaw overnight in the fridge before reheating. Eat fresh if using fresh herbs in the sauce.
- 搭配建议
- Pair with a simple green salad dressed with lemon and olive oil to cut the richness. Serve with crusty bread to soak up the cheesy sauce, especially for kids who prefer dipping.
简要说明
- 标记为健康:规划器在“减肥”和“吃得健康”的目标下更常选用它。
评论 0
登录 以便发表评论。
还没有评论。