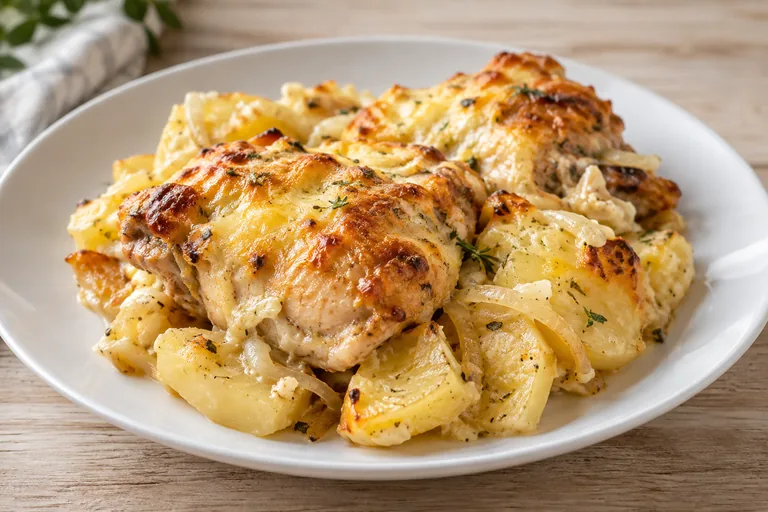
奶酪烤鸡土豆
嫩滑的土豆和鸡肉层,烤在奶酪酸奶油中。简易日常菜谱。
- 烹饪时间
- 60 分钟
- 份量
- 776 kcal
- 材料
- ≈ $2.08
- 蛋白质
- 43 g
材料
- 1 Chicken thighs包装 900 克 约等于 $3.81 150 克
- 2 Potatoes≈ $2.15 每千克 250 克
- 3 Onions≈ $1.60 每千克 50 克
- 4 Sour cream 15%包装 300 克 约等于 $1.60 50 克
- 5 Hard cheese包装 200 克 约等于 $2.64 40 克
- 6 Garlic≈ $10.00 每千克 3 克
- 7 Sunflower oil 6 毫升
- 8 Paprika 1 克
- 9 Salt 2 克
灰色行表示常备食材:盐、油、香料。它们不计入每份价格。
做法
准备:把土豆洗净,去皮切成厚约0.8厘米的圆片;把烤箱预热至190°C;用植物油涂抹大约22×30厘米的烤盘。
把土豆与盐和一半酸奶油拌匀,直到均匀裹覆。
把鸡腿切成块并加盐。
在烤盘中按顺序铺一层土豆、洋葱、鸡肉,再铺一层土豆;抹上酸奶油,摊 平。
表面撒上奶酪并轻轻压实。
盖上锡纸放入以190°C中火烤45分钟;土豆变软,酸奶油变热,表面不出现金黄。
揭去锡纸,在同样温度和火力下再烤10分钟,直至奶酪表面金黄卷匀。
静置5–10分钟后分成份量盛上,搭配香草作为配菜食用。
小贴士
- 为什么这样做
- Cut chicken into even-sized pieces so they cook fully in 45 minutes without drying out. Overlarge pieces stay tough; too-small ones overcook.
- 可替换食材
- Use Greek yogurt instead of sour cream (same amount) for a tangier, lighter sauce. Skip paprika if you lack it. Cheese will still brown.
- 常见错误
- If the top stays pale after 10 minutes uncovered, the oven isn’t hot enough. The cheese should bubble and turn golden.
- 保存与加热
- Eat within 2 days. Reheat covered in the microwave for 2 minutes, then 5 minutes in the oven at 180°C to crisp the cheese.
- 搭配建议
- Pair with a simple green salad and crusty bread for a balanced, filling meal on a weeknight.
简要说明
- 在计划器中,此菜可做两天:第二天再加热。
评论 0
登录 以便发表评论。
还没有评论。